This section guides the user through a typical verification process. Portions of this section require referral to some software sections of the Users Help System for additional information.
Using the Engineer mode a Target 10 specification can be created by using a data run and recipe or a data run and recipe already developed. Once this file has been created, it can be used to verify a process or machine performance along with the M.O.L.E. Profiler and/or OvenCHECKER™.
After the hardware is setup and the software is installed, use the following steps to verify a process using a M.O.L.E. Profiler.
Step 1: Create Target 10 File
|
This is available when in MAP is in Engineer Mode. View Menu>Mode>Engineer |
.png "Important Information")
| 1) | Connect the M.O.L.E. Profiler to the computer. Refer to the Communications Setup topic for your specific M.O.L.E. Profiler for more information. |
| 2) | Open the OvenCHECKER™ barrier box and connect the M.O.L.E. Profiler to the Connector Bridge. |
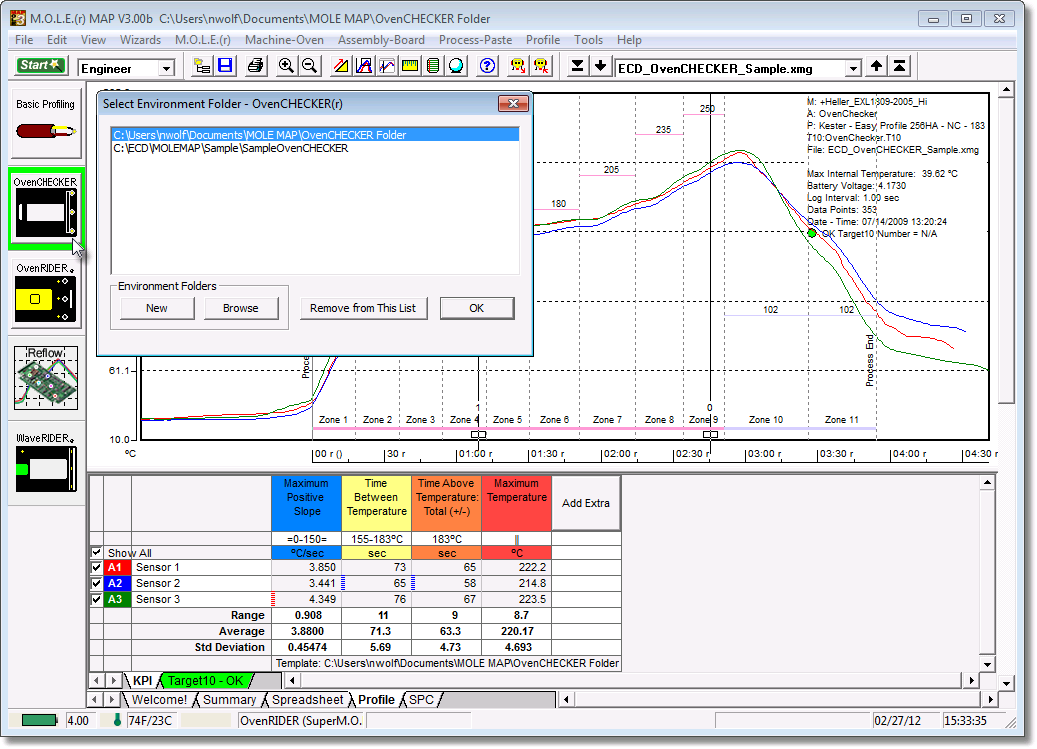
| 3) | Open an existing OvenCHECKER™ Environment Folder or create a new one. |
|
If the desired Environment is not displayed on the Environment Sidebar, the user can enable it from the Preferences dialog. File Menu>Preferences>Misc Tab. |
| 4) | Select the New (Start) button |
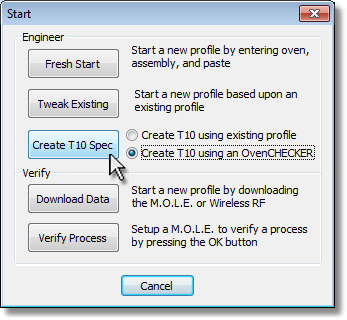
| 5) | On the Start dialog box, select the Create T 10 using an OvenCHECKER radio button then click the Create T 10 Spec command button and the workflow wizard appears. |
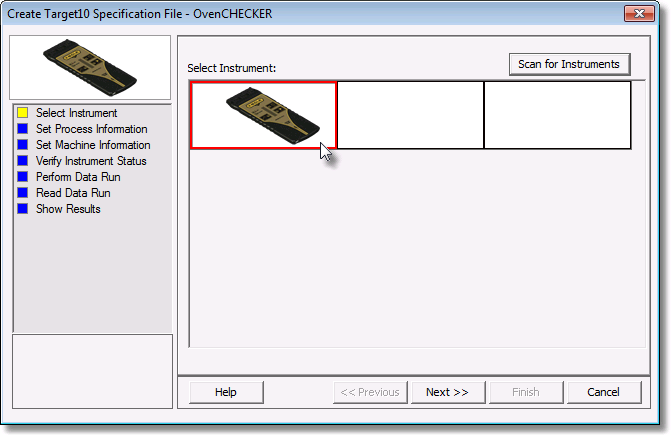
| 6) | Select the instrument type that will be used to verify the process. |
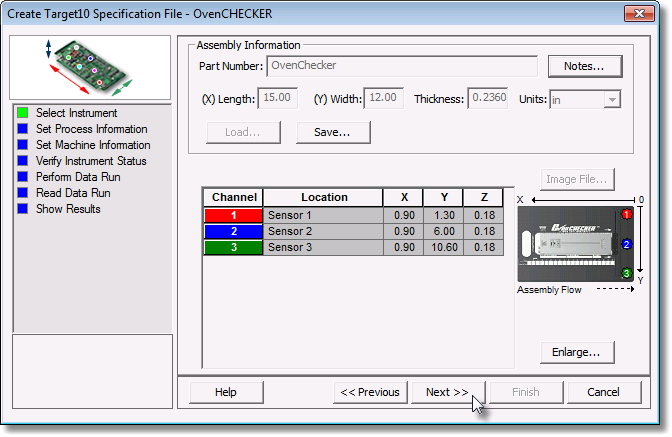
| 7) | Confirm the sensor selection and then select the Next command button. This assembly information can then be saved from/to a an (*.XMA) file. |
| 8) | Select the Next command button to send the settings to the instrument. |
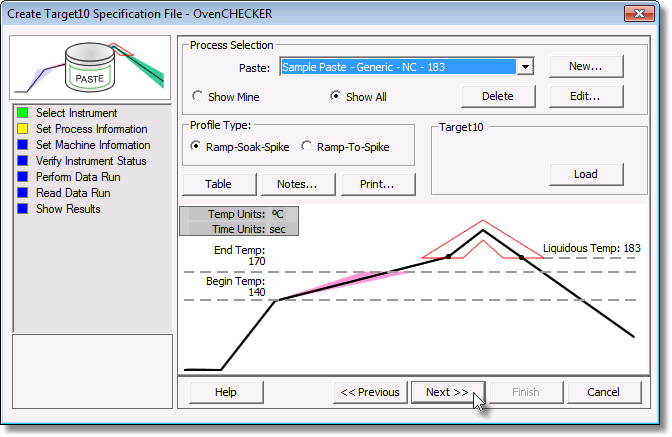
| 9) | Select your process specification. Select a Paste from the database or previously created Target 10 Specification. If your Paste does not appear in the database list click the New command button to create a new one. Refer to topic Create new Paste for more information. |
| 10) | Then choose the Profile Type (Ramp-Soak-Spike or Ramp-to-Spike). Ramp-Soak-Spike profile types are the only type allowed to be edited. |
|
When the user selects a paste from the database, they can use the radio buttons below the drop down box to filter and display only the user created pastes from paste database. |
.png "Tip")
|
The OvenCHECKER™ uses the begin temp, end temp and liquidous temp to measure the initial slope, soak, TAL (time above liquidous), peak parameters from the selected Paste or Target 10 Specification. Then based on the range of the parameters taken from the 3 OvenCHECKER™ sensors, automatically calculates the USL (Upper Specification Limits) and LSL (Lower Specification Limits). |
| 11) | Click the Next command button. |
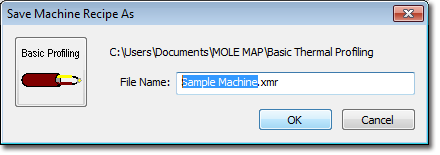
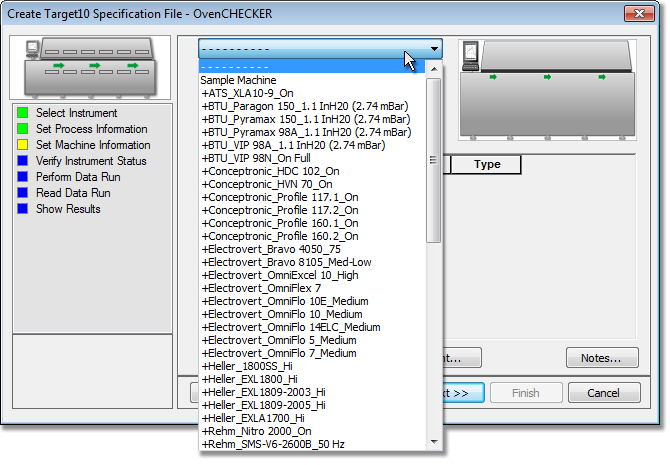
| 12) | Select a machine from the machine drop down list. If your machine does not appear in the list, continue to set the machine information and select the Save As command button to save the new machine settings as an (*.XMR) file in the current Environment. Refer to topic Create new Machine for additional information. |
| This new machine file now appears in the machine drop down list for applying to new and existing data runs. |
|
If the user has an existing machine (*.XMR) file that is not listed in the Machine drop down list, it can be loaded/imported by selecting the Load command button. Once loaded, this new machine file appears in the machine drop down list for applying to new and existing data runs. |
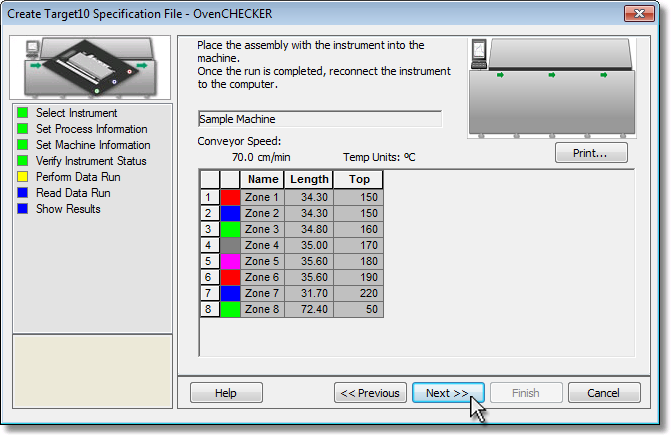
| 13) | Set the machine zone units. |
| 14) | Set the number of all machine zones (heating and cooling). |
| 15) | Set the machine temperature units. |
| 16) | Set the machine conveyor speed and units. |
| 17) | In the machine zone matrix, set the zone names (descriptions), zone lengths, zone temperatures (top / bottom) and zone types (heating or cooling). |
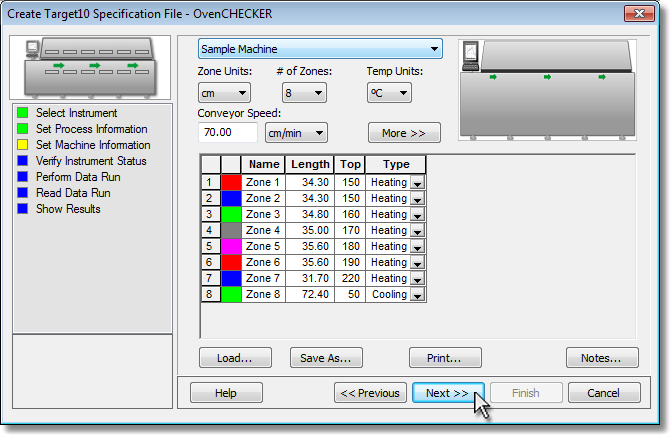
| 18) | Click the Next command button. |
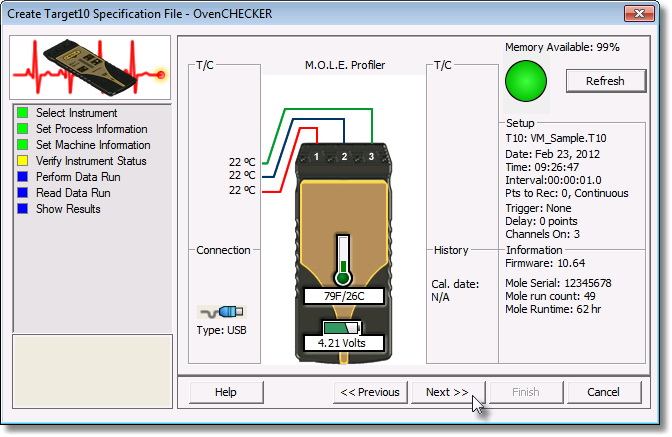
| 14) | Verify the instrument status. This dialog box displays the health of the M.O.L.E. Profiler such as Power Pack charge, internal temperature, thermocouple temperatures. |
|
If everything is OK, the dialog box displays a GREEN symbol. If there are any items that may prevent the user from collecting good data, they are highlighted and a yellow Warning symbol is displayed.
|
| 15) | Review the machine settings and click the Next command button to continue. |
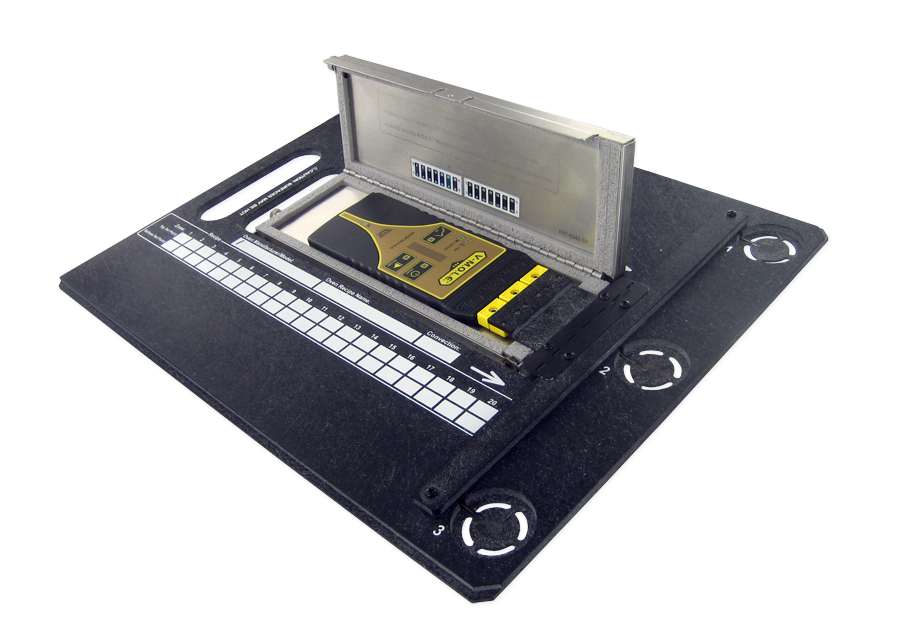
| 16) | Insert the M.O.L.E. Profiler into the OvenCHECKER™ pallet and press the "ON" button. |
|
Never permit the equipment to exceed the absolute maximum warranteed internal temperature, as permanent damage may result. The warranty will not cover damage caused by exceeding the maximum specified internal temperature. |
.png "Caution")
| 17) | After the oven stabilizes, turn the M.O.L.E. Profiler on and press the "Record" button and close the Thermal Barrier. |
| 18) | Pass the thermally protected M.O.L.E. Profiler and test assembly through the machine. |
|
It is highly recommended that protective gloves are used when retrieving the OvenCHECKER™ from the oven and when opening the thermal barrier. |
.png "Warning")
| 19) | As the OvenCHECKER™ and M.O.L.E. Profiler emerge from the machine, carry them to a table or flat surface. |
|
If M.O.L.E. Profiler is removed before it has stopped collecting data, the data might become distorted. |
| 20) | Open the Thermal Barrier and if the Record LED is still flashing this means the M.O.L.E. Profiler is still recording and it should be stopped. |
| 21) | Remove the M.O.L.E. Profiler from the Thermal barrier. Handle it carefully, as the case may still be warm. |
|
Only the MEGAM.O.L.E.™ 20, V-M.O.L.E.™ and SuperM.O.L.E.™ Gold 2 are equipped with the OK button. When using the SuperM.O.L.E.™ Gold please skip the previous step. |
| 22) | Connect the M.O.L.E. Profiler to the computer and click the Next command button. |
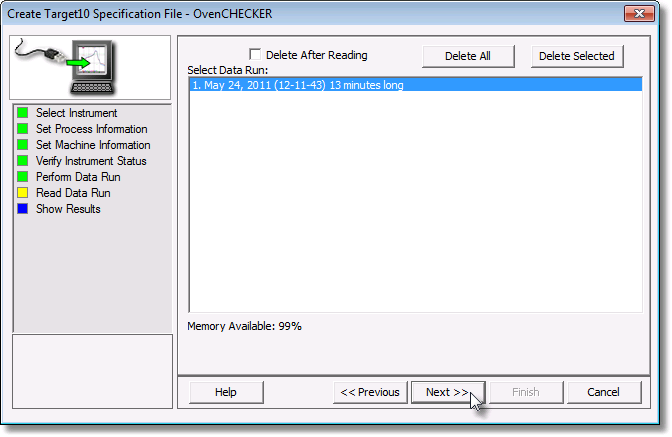
| 23) | Restore the software and click the Next command button to read the data run from the M.O.L.E. Profiler. |
|
This step of the wizard allows the user to remove a selected data run from the M.O.L.E. Profiler by either selecting the Delete After Reading check box or selecting the Delete command button and removing it before downloading. This feature is not available for the SuperM.O.L.E.™ Gold Thermal Profiler as it does not have the ability to store more than one data run. |
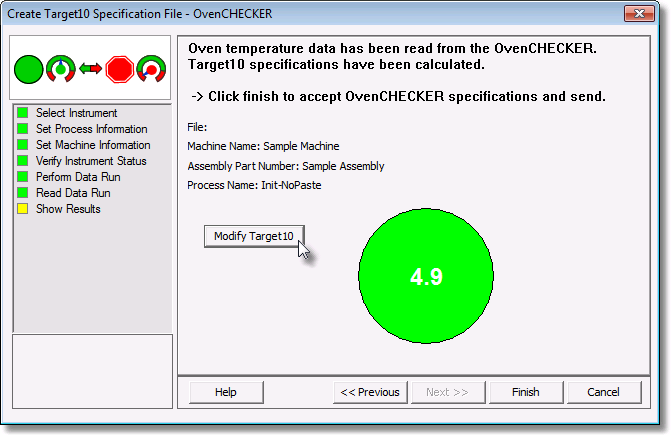
| 24) | Once the OvenCHECKER™ data run is downloaded, review the calculated results of the Target 10 specification. The user can then decide if they wish to accept these or make final modifications to the Slope, Soak, Time Above and/or Peak parameter. |
|
If the user decides to make modifications, click the Modify Target 10 command button and the the Target 10-OK tab is displayed. Make the desired modifications to the Slope, Soak, Time Above and/or Peak parameter specifications. If any of the parameter specifications are changed the OK button will inform the user by displaying (OK Modified). |
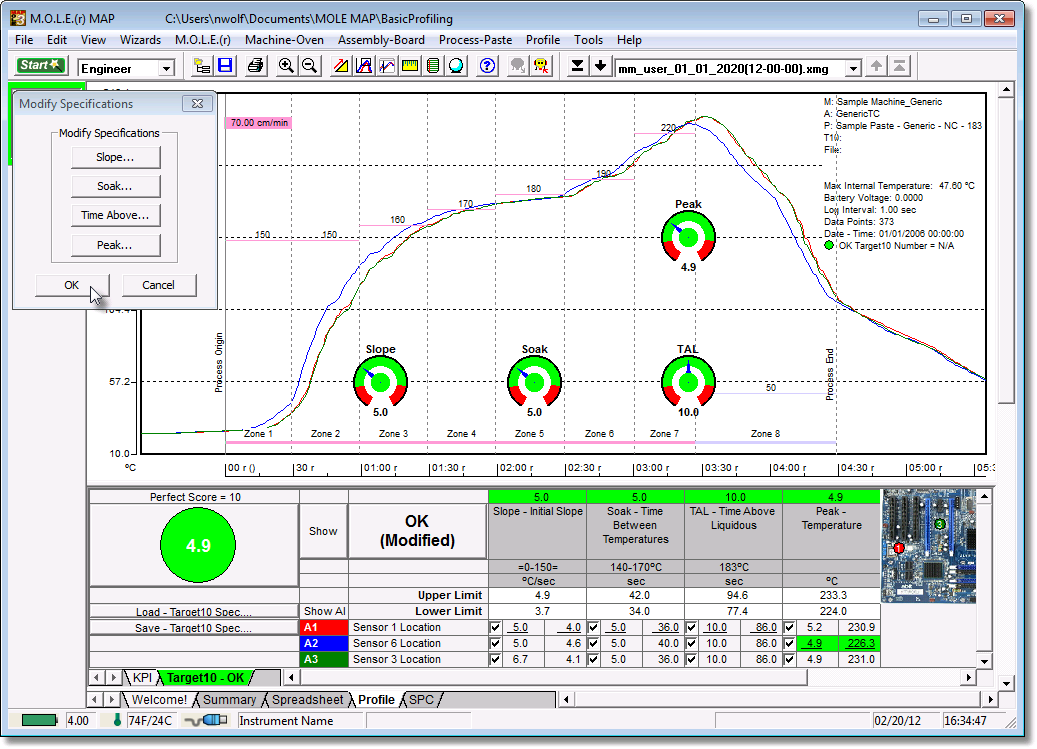
| 25) | Click the OK command button to accept the modified specifications or Cancel to discard them and return to the workflow wizard. |

| 26) | Click the Finish command button and the software prompts the user to save the Target 10 Specification file (*.T10). |
|
If a data run (*.XMG) is saved in a different Environment Folder other than the currently selected, the software automatically activates the new Environment Folder. This process does not delete any data run files in the previously set Environment Folder and can be quickly accessed using the Recent Environment Folders on the File menu. |
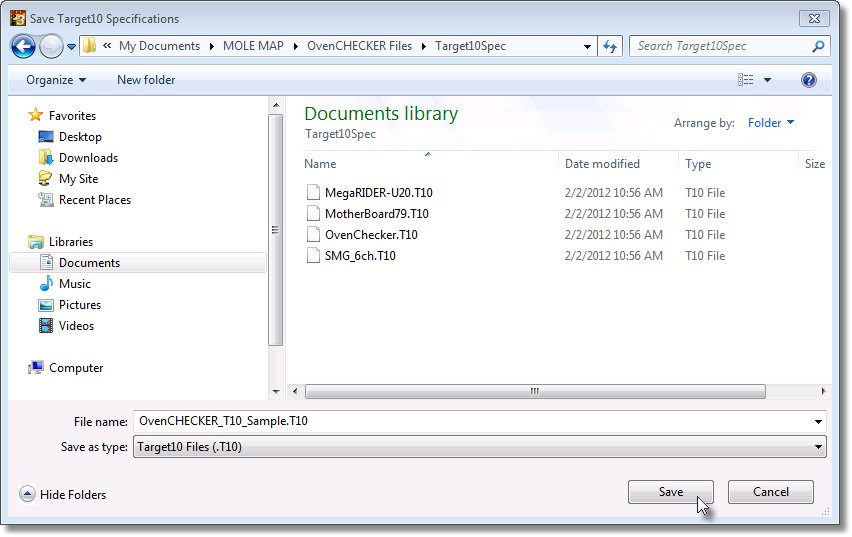
| 27) | When finished naming the file, click the Save command button to complete the workflow wizard. This step saves both the Target 10 Specification file (*.T10) and the downloaded data run which is displayed on the Target10-OK tab. |
This OvenCHECKER™ Target 10 Specification can now be used to verify that your machine performance is the same
in the future.