Prior to operation the M.O.L.E. thermal profiler must be configured to properly communicate with the M.O.L.E.® MAP Software.
|
The M.O.L.E.® MAP software must be installed prior to communications setup. (Refer to Software Installation for more information). |
.png "Important Information")
To connect the M.O.L.E. Profiler:
| 1) | Insert the USB computer interface cable into a computer USB Port and the other end into the Data/Charging Port. |

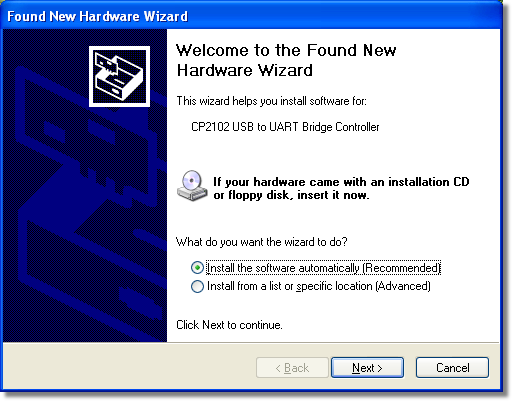
| 2) | During installation of the device driver, when prompted to select the location of the device driver, select "Install the software automatically". Follow the remaining wizard instructions closely. |
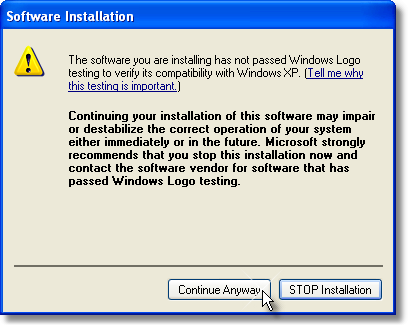
| 3) | During installation of the USB driver a message box appears, select the Continue Anyway command button and the driver will be successfully installed. |
| 4) | After M.O.L.E. Profiler is connected to a computer, the software must be configured so they can communicate. Start the software program by either double-clicking the M.O.L.E.® MAP software icon or selecting it from the ECD program sub-menu. |

| 5) | On the M.O.L.E. menu, click the Select Instrument command. |
| 6) | Select the desired instrument from the dialog box. If there are none displayed, click the Scan for Instruments command button to detect all available instruments. |

|
If the software does not detect a M.O.L.E. thermal profiler, using the communication cable connect it to the computer and click the Scan for Instruments command button to search again. M.O.L.E.® MAP software allows multiple instruments to be connected to a computer at one time. Selecting the Scan for Instruments command button will detect all instruments and display them in the dialog box. If no instrument is detected the software displays all of the Demonstration thermal profilers to select from. |
| 7) | Click the OK command button to accept or Cancel to quit the command. |