|
This process is only available for SuperM.O.L.E.™ Gold 2 & MEGAM.O.L.E.™ 20 Profilers. |
.png "Important Information")
|
To log real-time data, the recording parameters for the M.O.L.E. Profiler must be configured. Refer to section Software>Menus>MOLE Menu>Setup Instrument for more information. |
The Download Data workflow:
| 1) | Start the software by double clicking on the program icon. |
| 2) | Connect the M.O.L.E. Profiler to the computer. Refer to the Communications Setup topic for your specific M.O.L.E. Profiler for more information. |
| 3) | Make sure the M.O.L.E. Profiler Power Pack battery is fully charged. When a M.O.L.E. Profiler is selected, the software status bar displays the current battery voltage. Refer to topic Status Bar for more information. |
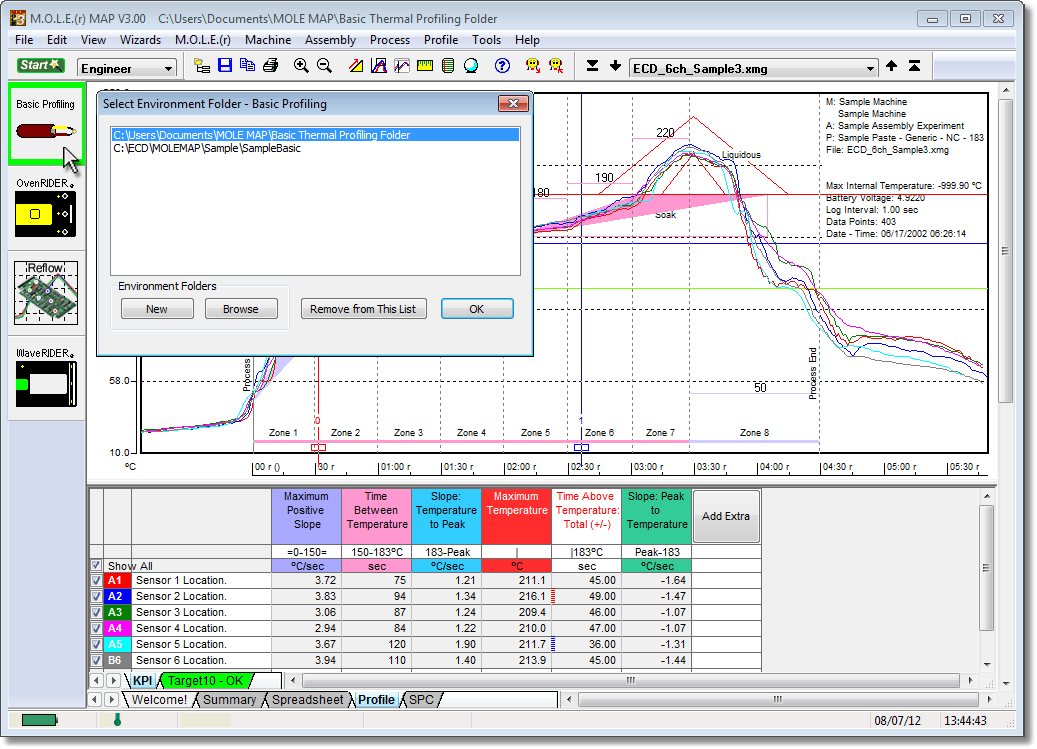
| 4) | Set an Environment related for the type of experiment that is being performed. Either open an existing Environment Folder or create a new one. |
|
If the desired Environment is not displayed on the Environment Sidebar, the user can enable it from the Preferences dialog. File Menu>Preferences>Misc Tab. |
 5) Select the New (Start) button
 ![]() on the toolbar. The Start dialog box appears with the five workflow wizard options.
on the toolbar. The Start dialog box appears with the five workflow wizard options.

| 6) | On the Start dialog box, click the Download Data command button and the workflow wizard appears. |
|
When navigating through the wizard, the step list on the left uses a color key to inform the user of the current step, steps that have been completed and remaining steps.
|
| 7) | Select the desired instrument from the dialog box. If a M.O.L.E. Profiler has already been selected during a different process, the software automatically selects the M.O.L.E. Profiler connected to the COM Port previously used. |
|
If the software does not detect a M.O.L.E. Profiler, connect it to the computer and click the Scan for Instruments command button to search again. M.O.L.E.® MAP software allows multiple instruments to be connected to a computer at one time. Selecting the Scan for Instruments command button will detect all instruments and display them in the dialog box. If no instrument is detected the software displays all of the Demonstration thermal profilers to select from.
|


| 8) | Click the Next command button. |
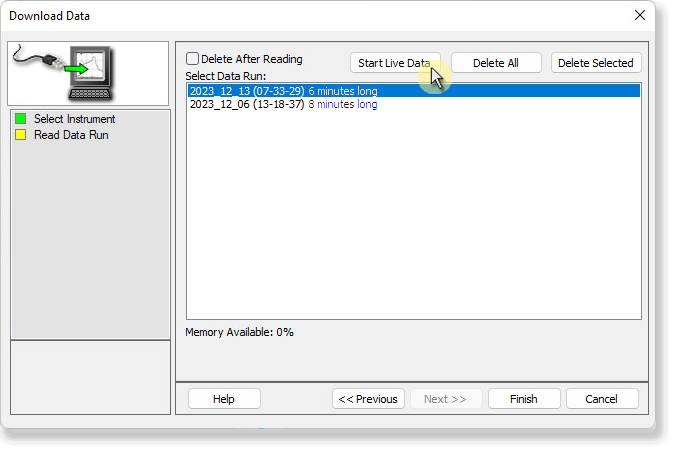
| 9) | Select Start Real-time RF on data run list then select the Finish command button to display the RF Control dialog box. |
| 10) | Once the RF Control dialog is displayed, it includes the following command buttons and information: |
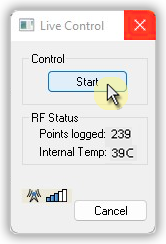
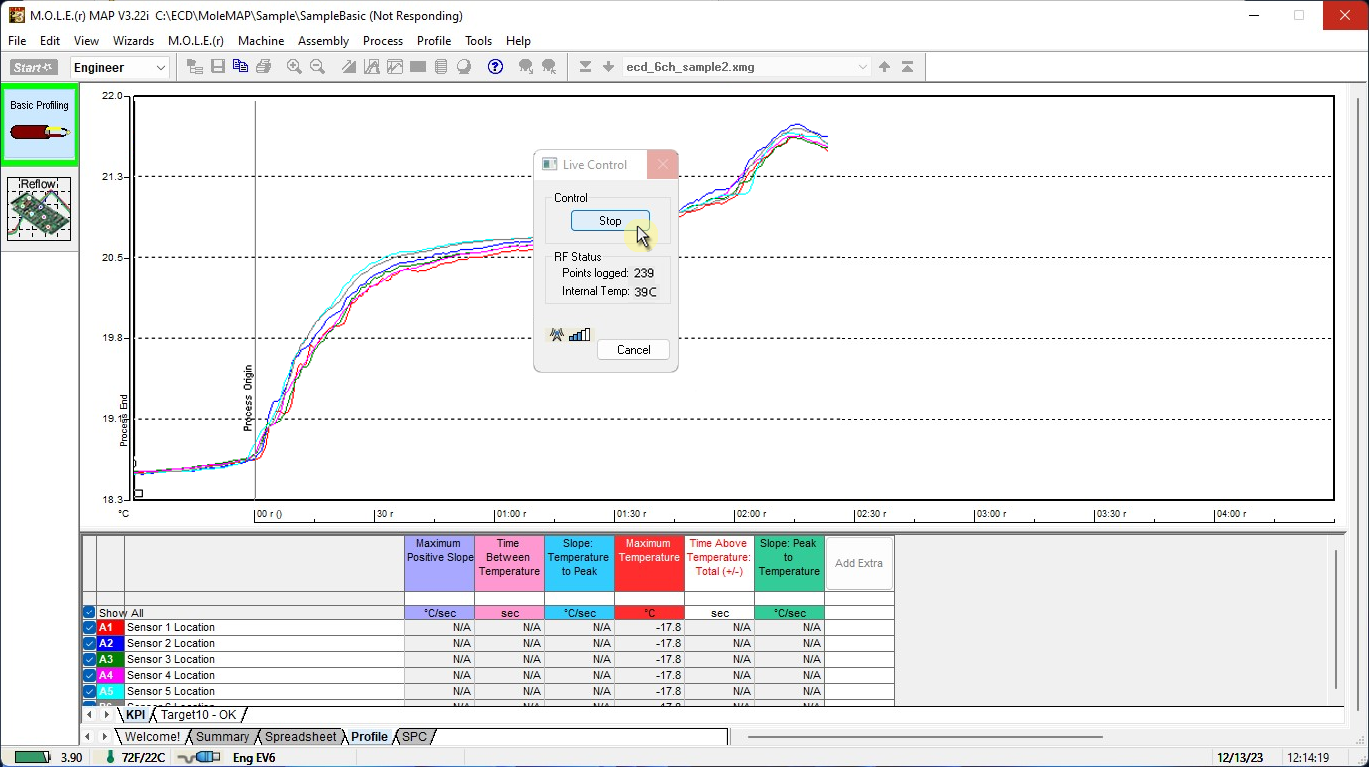
Start/Stop:
•Starts logging real-time data and is displayed on the Data Graph.
•Once the Start command button is selected it automatically changes to a Stop command button which Stops the M.O.L.E. Profiler logging real-time data.
RF Status:
•Points logged: Indicates number of data points received.
•Internal Temp: Indicates the current internal temperature of the M.O.L.E. Profiler.
•RF Status: Signal strength indicator with 5 bars indicating relative strength of the RF signal.
Save:
•Stops the M.O.L.E. Profiler logging real-time data and allows the user to save that data. If there is not enough data recorded, the software displays a “Not enough data to profile” message, and it will cancel the data run.
|
When real-time data is logging using the MEGAM.O.L.E.™ 20 or SuperM.O.L.E.™ Gold 2 Profiler, some of the transmitted data may not get logged on the Data Graph. While transmitting the real-time data the M.O.L.E. Profiler also records the data run. The software prompts the user to either decide to connect the M.O.L.E. Profiler to the computer and replace the real-time data with the data run stored in the M.O.L.E. Profiler, or retain the real-time data and have the software substitute the gaps with a straight line between missing points. |
Cancel:
•Stops the M.O.L.E. Profiler logging real-time data discarding any recorded real-time RF data.
|
When real-time data logging has stopped, the software automatically processes the data. Depending on how long the data run is, it may take a few moments to complete. |
| 11) | Click the Save command to save the data run. The software prompts the user to specify a file name (*.XMG). |
|
If a data run (*.XMG) is saved in a different Environment Folder other than the currently selected, the software automatically activates the new Environment Folder. This process does not delete any data run files in the previously set Environment Folder and can be quickly accessed using the Recent Environment Folders on the File menu. |

| 12) | When finished, click the Save command button to complete the process. |
Wireless communication tips:
Wireless signals come and go as either the M.O.L.E. thermal profiler moves through the oven or the Transceiver is moved around like FM radio static as you drive in your car. Moving a few inches in any direction can turn a low signal strength to high signal strength. This gets worse as the Transceiver gets further from the M.O.L.E. to a point where no position works.
When setting up the Wireless system, the transceiver should be placed as close to the machine as practical. A standard USB extension cable can be used to move the Transceiver closer to the machine or up and away from metal or other interference objects.
Typically if the Transceiver is 3 meters [10 feet] away from the M.O.L.E. in a machine any location in the room, reception should be fine. Reception is also often a bit better when the Transceiver is perpendicular to the direction of travel through the machine. Metal objects such as carts, walls, or other equipment in the room will impede transmission.
The transmitting Antenna and its proximity to metal can have a big affect. Care should be taken to make sure the Antenna is not laying on metal parts in the machine or barrier box. Keeping the Antenna straight is best.
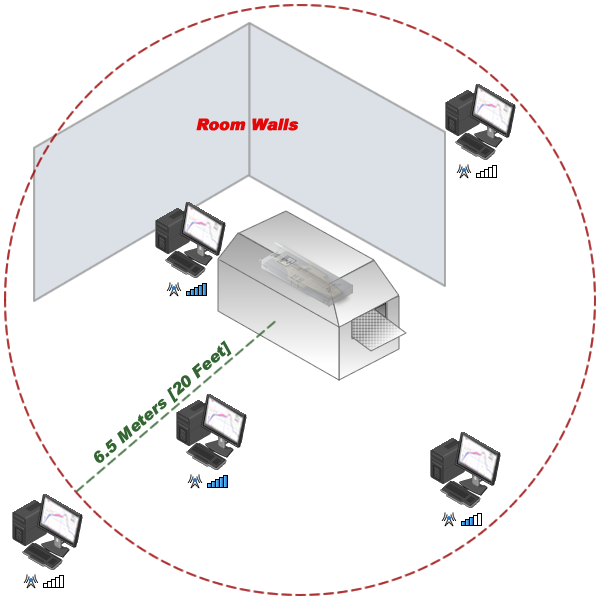
Wireless Range