|
Prior to Installation: •The user must have administrator permissions for the computer to install M.O.L.E.® MAP software. |
.png)
Step 1: Installation Instructions:
AutoPlay Install:
| 1) | Insert the Flash Drive in a USB Port and the AutoPlay menu appears. |
|
If the AutoPlay menu does not appear, manually launch Windows® Explorer. |
.png)
| 2) | Select Open folder to view files button on the AutoPlay menu to launch Windows® Explorer. |
|
Prior to Installation: •The user must have administrator permissions for the computer to install M.O.L.E.® MAP software. |
| 3) | Select setup.exe to launch the installation. |
.png)
|
Once the install process has started, it may take a few minutes for the installer to prepare. To continue installation, DO NOT select the Cancel command button as it will stop the process. |
.png)
| 4) | Select the Next command button to continue the installation process. |
.png)
| 5) | Review the License Agreement. |
| 6) | Select the Accept option and the Next command button to continue. |
.png)
| 7) | Select your Industry and the Next command button to continue. By selecting your industry, the software installs unique files such as templates and oven models. |
.png)
| 8) | Select the Environments that are going to be primarily used with M.O.L.E.® MAP software. |
|
After installation, these Environments can be changed on the Preferences Profile Tab. Refer to topic Menu and Tools Commands>File Menu>Preferences>Misc for more information. |
.png "Important Information")
.png)
| 9) | Select the preferred Temperature Units for the Data Graph and then the Install command button to proceed. |
|
After installation, this setting can be changed on the Preferences Profile Tab. Refer to topic Menu and Tools Commands>File Menu>Preferences>Profile for more information. |
.png)
|
During installation, an additional program is installed enabling M.O.L.E.® MAP to print to PDF. Refer to topic Menu and Tools Commands>File Menu>Print for more information.
|
.png)
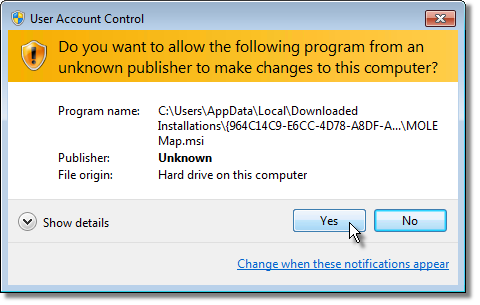
| 10) | Depending on the operating system security settings, a User Account Control dialog may appear. Select the Yes command button to continue the installation. |
| 11) | Select the Install command button to install the USB drivers so the software can communicate with the M.O.L.E.® Profiler. |
.png)
| 12) | To complete the installation, select the Finish command button. |
.png)
Install complete. A M.O.L.E.® MAP icon appears on desktop.
Step 2: Starting the Software:
|
Prior to starting, click the README icon from the M.O.L.E.® MAP program sub-menu to read the latest release notes. |
After the software is installed, start the software program by double-clicking the M.O.L.E.® MAP icon from the desktop.

|
Once the software installation and is running correctly, it is important to start the software and configure the software to communicate with the M.O.L.E. Refer to the Communications Setup topic for your specific M.O.L.E. Profiler for more information. |
Step 3: Software Authorization:
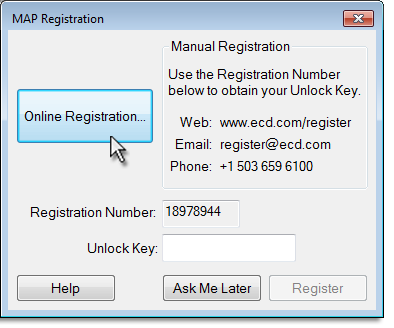
The software is a fully functional program that does not require registration to use and can be registered at any time.
|
Version 3.22 and higher no longer includes registration reminders. |
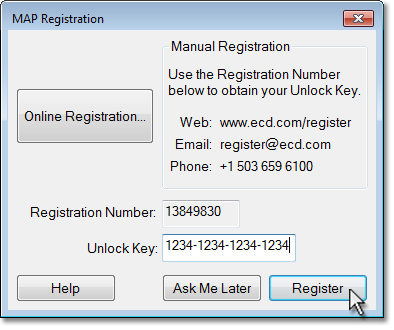
An Unlock Key can be obtained via an online registration form or using the contact information supplied on the dialog box, contact ECD.
To Web Register:
| 1) | On the Help menu, click Register and the dialog box appears. |
| 2) | Enter the required information on the M.O.L.E.® MAP Software Registration form. |
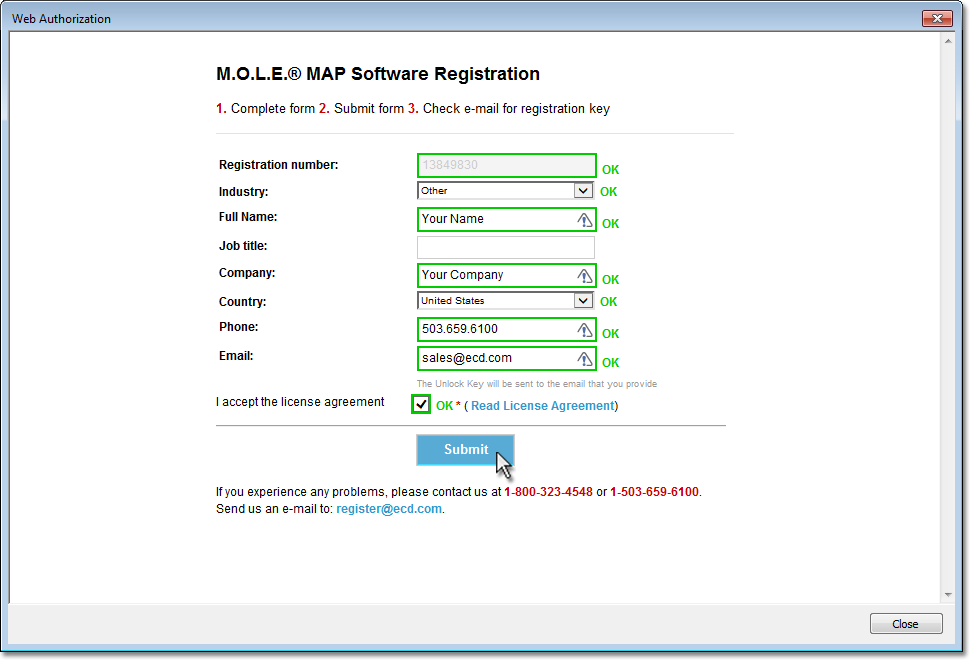
| 3) | When finished select the Submit button. A confirmation screen appears indicating that the Unlock Key has been sent to the email address provided in the form. |
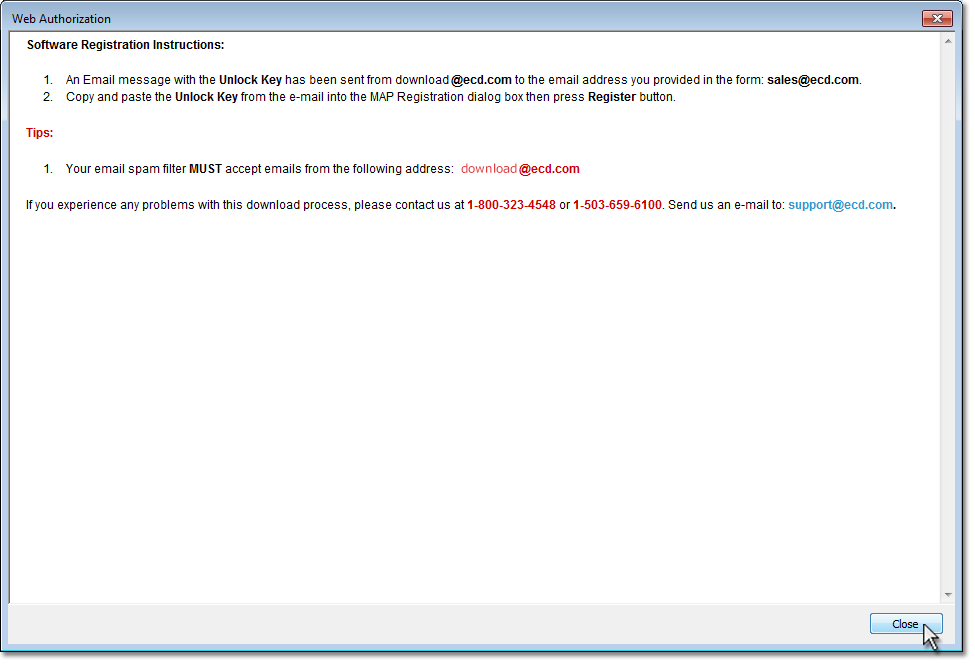
| 4) | Enter the 16-digit Unlock Key and then the Register command button to complete the software Registration. |
|
|
.gif "Visual Tutorial")