The following procedures describe how to construct a nano thermocouple and a protective plug.
Thermocouple construction:
The following items will be needed to construct a Thermocouple:
•1 nano thermocouple housing and 2 hardware screws.
•Up to five Thermocouples.
•Phillips (Crosshead) screwdriver
Construct a thermocouple as follows:
| 1) | Disassemble the thermocouple housing by unscrewing the 2 Phillips hardware screws. |
| 2) | Remove the existing thermocouple(s). |
| 3) | Insert the new thermocouple(s) in the top half of the thermocouple housing until they are fully seated. Be careful to place them in the proper color arrangement per the table below. |
Channels: |
1/11 |
2/12 |
3/13 |
4/14 |
5/15 |
6/16 |
7/17 |
8/18 |
9/19 |
10/20 |
Color: |
Red |
Blue |
Green |
Violet |
Cyan |
Red |
Blue |
Green |
Violet |
Cyan |
| 4) | Route the wires through the housing exit. |
| 5) | Carefully place the two halves of the thermocouple housing together. Verify that the wires are not pinched and that the wire positions are correct. |
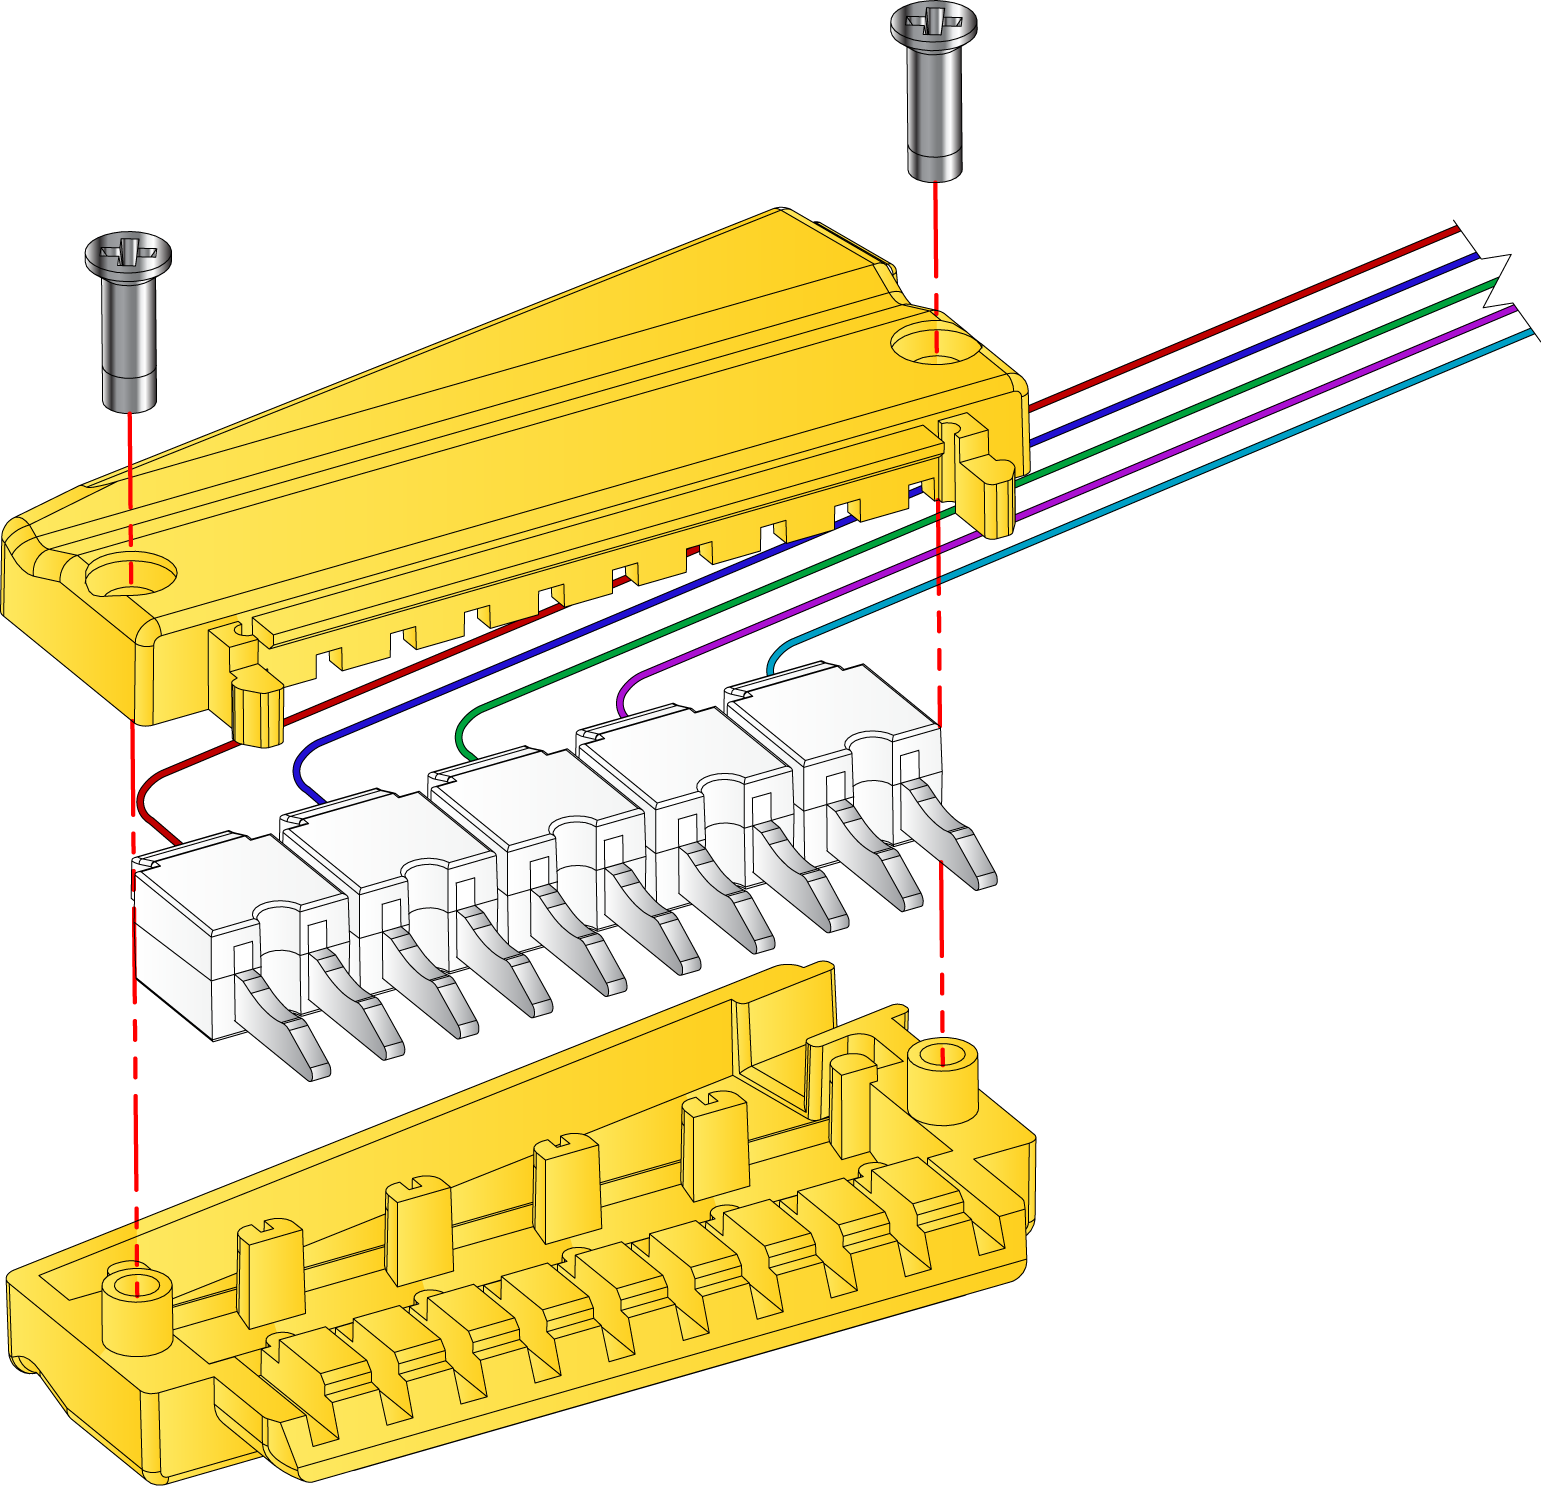
| 6) | Replace the hardware screws. |
Protective plug construction
If fewer than four nano connectors (20 sensors) are used in your application, a protective plug may be used for each of the unused I/O Module channel banks.
The following items will be needed to construct a Thermocouple:
•1 nano thermocouple housing and 2 hardware screws.
•Phillips (Crosshead) screwdriver
Construct a protective plug as follows:
| 1) | Carefully place the two halves of the thermocouple housing together. |
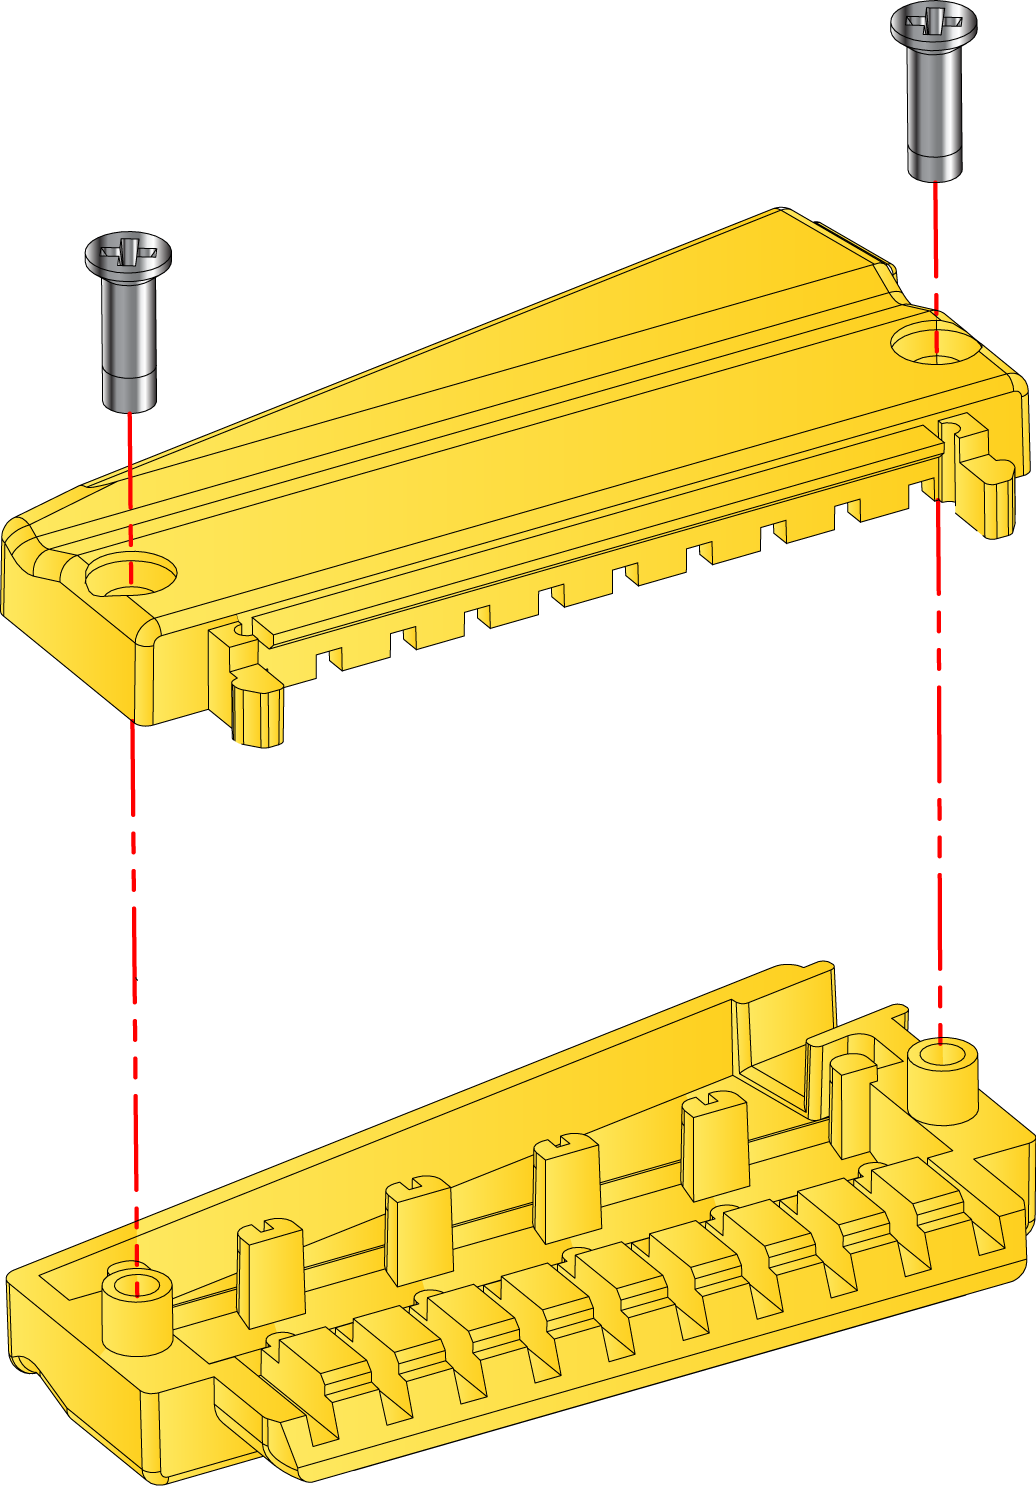
| 2) | Replace the 2 hardware screws. |