The Tweak Existing workflow is a wizard that starts a new profile (data run) using the established Machine (oven), Assembly (board) and Process (Paste) information from an existing profile.
|
This is available when in MAP is in Engineer Mode. View Menu>Mode>Engineer |
.png "Important Information")
The Tweak Existing workflow:
| 1) | Connect the M.O.L.E. Profiler to the computer. Refer to the Communications Setup topic for your specific M.O.L.E. Profiler for more information. |
| 2) | Select the New (Start) button |
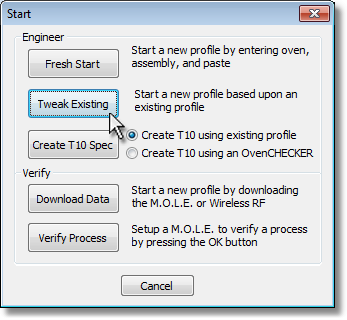
| 3) | On the Start dialog box, click the Tweak Existing command button and the workflow wizard appears. |
|
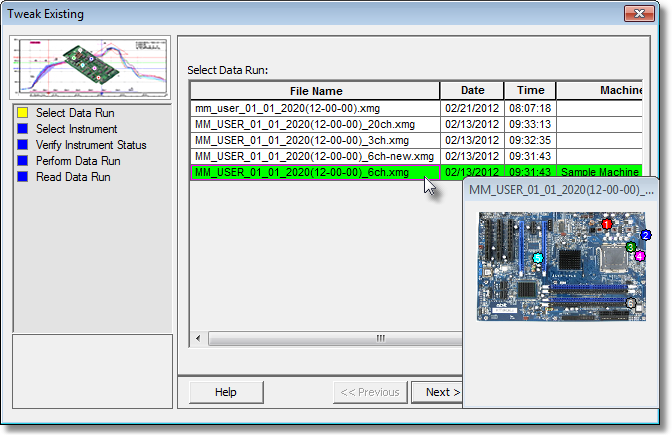
When navigating through the wizard, the step list on the left uses a color key to inform the user of the current step, steps that have been completed and remaining steps.
|
| 5) | Click the Next command button. |
|
If the software does not detect a M.O.L.E. thermal profiler, using the communication cable connect it to the computer and click the Scan for Instruments command button to search again. M.O.L.E.® MAP software allows multiple instruments to be connected to a computer at one time. Selecting the Scan for Instruments command button will detect all instruments and display them in the dialog box. If no instrument is detected the software displays all of the Demonstration thermal profilers to select from. |
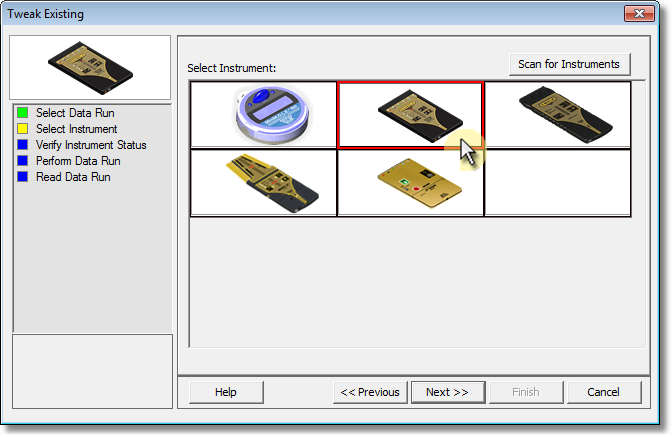
| 7) | Click the Next command button. |
|
If the I/O module is not connected to the MEGAM.O.L.E.™ 20 Profiler, the software will display a warning message that the instrument is not communicating. |
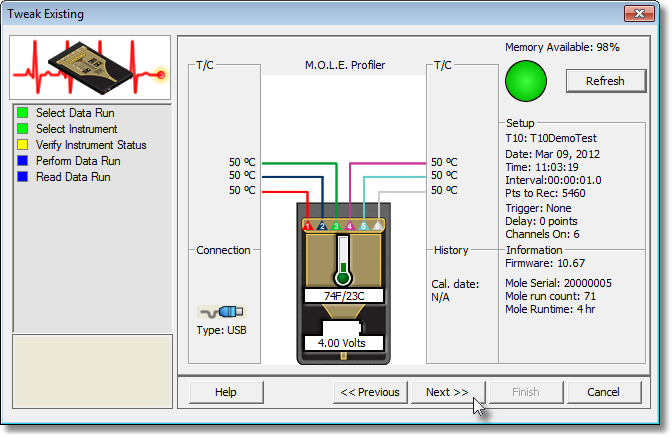
| 9) | Click the Next command button. |
| 10) | Review the oven settings and click the Next command button to continue.. |

11)Pass the thermally protected M.O.L.E. Profiler and test product through the process. Refer to Step 2 of the Quick Start Guide topic for your M.O.L.E. Profiler for more information
|
If the M.O.L.E. Profiler already contains a data run or if the the selected M.O.L.E. Profiler is Wireless RF, click the Next command button to proceed to the next step. |
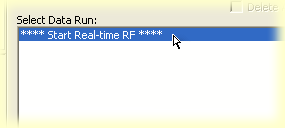
| 12) | Select the desired data run and then click the Finish command button to complete the wizard and read the data run from the M.O.L.E. Profiler. |
|
If the user has selected to use a SuperM.O.L.E.™ Gold 2 or MEGAM.O.L.E.™ 20 Wireless RF option, select Start real-time RF on the top of the data run list and then the Finish command button to display the RF Control dialog.
|
|
This step of the wizard allows the user to remove a selected data run from the M.O.L.E. Profiler by either selecting the Delete After Reading check box or selecting the Delete command button and removing it before downloading. This feature is not available for the SuperM.O.L.E.™ Gold Thermal Profiler as it does not have the ability to store more than one data run. |
.png "Tip")

| 13) | When the data run has been downloaded, the software prompts the user to specify a new file name (*.XMG). |
|
If a data run (*.XMG) is saved in a different Environment Folder other than the currently selected, the software automatically activates the new Environment Folder. This process does not delete any data run files in the previously set Environment Folder and can be quickly accessed using the Recent Environment Folders on the File menu. |
I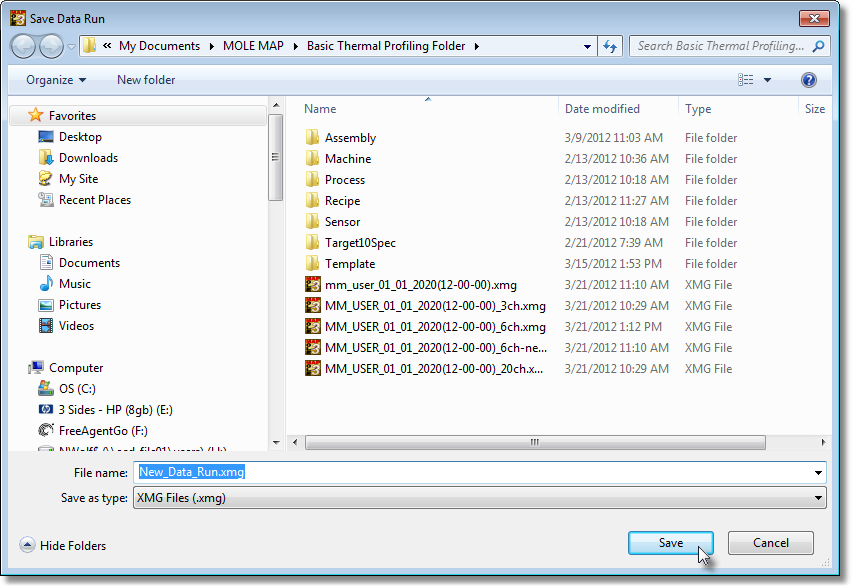
| 14) | When finished, click the Save command button to complete the process. |